AWS Client VPN With Terraform
Often times we want to work on a project utilizing AWS, but we do not want it exposed to the world. There are several options for this and most require a lot of work. One option is setup a vpn in the cloud, no thanks. Or perhaps we could setup a bastion server with a public ip and utilize ssh tunneling, again no thanks. I prefer to use AWS’s Client VPN
AWS’s Client VPN allows you to quickly and easy setup private access to your aws resources through a managed vpn service. You will be able to access your Client VPN from anywhere using an OpenVPN-based VPN client. AWS offers a client to use for Mac or Windows OS see here.
Please be aware that a Client VPN is not free and charges apply per connection and each connection will be billed for the full hour. Charges also apply for any data out. You can get more pricing information here . Please do not run the terraform code if you do not want to pay for AWS resources. You have been warned.
Dependencies
There are several requirements that need to be installed or configured prior to continuing with this tutorial.
- AWS Account
- AWS IAM user with permissions to create resources and api access
- AWS CLI installation instructions here
- AWS CLI Configured [instructions](https://docs.aws.amazon.com/cli/latest/userguide/cli-chap-configure.html
- Terraform installation instructions here
- Ansible installation instructions here
- Terragrunt installation instructions here
- Git installation instructions here
- Source Code here
- ide or text editor
Skills Required:
- General Understanding on AWS
- Comfortable with using the command line interface
- General Understanding of Linux
- Ability to install applications
Create Certs needed for Mutual Authentication
AWS’s Client VPN uses certificates to perform authentication between the client and the server. We will need to create our own using easyrsa.
First Lets Initialize pki. CD in the terraform directory and run the following command.
../easy-rsa/easyrsa3/easyrsa init-pki
Now lets build the CA. This command will present a prompt to enter in the Common Name for the Certificate.
../easy-rsa/easyrsa3/easyrsa build-ca nopass
Enter in your Common Name like so.
$ ../easy-rsa/easyrsa3/easyrsa build-ca nopass
Using SSL: openssl LibreSSL 2.2.7
Generating RSA private key, 2048 bit long modulus
....................+++
.................................................+++
e is 65537 (0x10001)
You are about to be asked to enter information that will be incorporated
into your certificate request.
What you are about to enter is what is called a Distinguished Name or a DN.
There are quite a few fields but you can leave some blank
For some fields there will be a default value,
If you enter '.', the field will be left blank.
-----
Common Name (eg: your user, host, or server name) [Easy-RSA CA]:MyCommonName
Generate the server certificate and key.
../easy-rsa/easyrsa3/easyrsa build-server-full server nopass
Generate the client certificate and key.
../easy-rsa/easyrsa3/easyrsa build-client-full client1.domain.tld nopass
Setting up Terragrunt and Creating the basic AWS resources.
First we will need to create our Terragrunt HCL file. CD into the terraform directory and create a terragrunt.hcl file with the following contents. Update the bucket name to something unique. S3 bucket names are required to be unique globally. Terragrunt will automatically create both the S3 bucket and dynamoDB table needed to manage the state of your infrastructure for more information on this see here.
inputs = {
  environment = "dev"
  region = "us-east-1"
  key_name  = "dev"
  profile   = "default"
}

remote_state {
  backend = "s3"
  config = {
    bucket = "{place a unique name here}-terraform-state"
    key = "terraform/${path_relative_to_include()}/terraform.tfstate"
    region = "us-east-1"
    encrypt = true
    dynamodb_table = "terraform-state"
  }
}
Your Terraform directory contents should now look as follows.
├── create.yaml
├── destroy.yaml
├── docker
│   ├── docker.tf
│   ├── instance_profile.tf
│   ├── main.tf
│   ├── security-group.tf
│   ├── terragrunt.hcl
│   └── varibles.tf
├── key-pair
│   ├── main.tf
│   ├── terragrunt.hcl
│   └── varibles.tf
├── pki
│   ├── lots of files here
├── terragrunt.hcl
└── vpc
    ├── main.tf
    ├── subnets.tf
    ├── terragrunt.hcl
    ├── varibles.tf
    └── vpc.tf
Now we are going to run the ansible playbook to create the the following resources.
- Server Certificate
- Client Certificate
- VPC
- Private Subnet
- Public Subnet
- Public Route Table
- Route Table Association
- Elastic IP Address
- Internet Gateway
- Nat Gateway
- Network acl
CD into the terraform directory and run the following commands.
ansible-playbook import-certs.yaml
ansible-playbook create.yaml
Great now we get to the good stuff. It is now time to create the Client VPN. CD in your terraform/vpc directory and create a file named client-vpn-endpoint.tf.
touch client-vpn-endpoint.tf
Your terraform/vpc directory should now look as follows:
├── client-vpn-endpoint.tf
├── main.tf
├── subnets.tf
├── terragrunt.hcl
├── varibles.tf
└── vpc.tf
Open the client-vpn-endpoint.tf file and add the following content. This will Create the AWS Client VPN Endpoint.
data "aws_acm_certificate" "server" {
  domain = "server"
}

data "aws_acm_certificate" "client" {
  domain = "client1.domain.tld"
}

resource "aws_ec2_client_vpn_endpoint" "dev" {

  description            = "clientvpn-endpoint"
  server_certificate_arn = data.aws_acm_certificate.server.arn
  client_cidr_block      = "172.20.0.0/16"
  split_tunnel           = true

  dns_servers = ["75.75.75.75", "76.76.76.76"]

  authentication_options {
    type                       = "certificate-authentication"
    root_certificate_chain_arn = data.aws_acm_certificate.client.arn
  }

  connection_log_options {
    enabled = false
  }

}

resource "aws_ec2_client_vpn_network_association" "this" {
  client_vpn_endpoint_id = aws_ec2_client_vpn_endpoint.dev.id
  subnet_id              = aws_subnet.public_a.id
}

resource "null_resource" "client_vpn_ingress" {
  depends_on = [aws_ec2_client_vpn_endpoint.dev]
  provisioner "local-exec" {
    when    = create
    command = "aws ec2 authorize-client-vpn-ingress --client-vpn-endpoint-id ${aws_ec2_client_vpn_endpoint.dev.id} --target-network-cidr 0.0.0.0/0 --authorize-all-groups"
  }
  lifecycle {
    create_before_destroy = true
  }
}

resource "null_resource" "export_endpoint_configuration" {
  depends_on = [null_resource.client_vpn_ingress]
  provisioner "local-exec" {
    when    = create
    command = "aws ec2 export-client-vpn-client-configuration --client-vpn-endpoint-id ${aws_ec2_client_vpn_endpoint.dev.id}  --output text > ../certs/client-config.ovpn"
  }
  lifecycle {
    create_before_destroy = true
  }
}

resource "null_resource" "append_client_certificate" {
  depends_on = [null_resource.export_endpoint_configuration]
  provisioner "local-exec" {
    when    = create
    command = "echo 'cert ${replace(path.cwd,"vpc","certs")}/client1.domain.tld.crt'  >> ../certs/client-config.ovpn"
  }
  lifecycle {
    create_before_destroy = true
  }
}

resource "null_resource" "append_client_key" {
  depends_on = [null_resource.export_endpoint_configuration]
  provisioner "local-exec" {
    when    = create
    command = "echo 'key ${replace(path.cwd,"vpc","certs")}/client1.domain.tld.key'  >> ../certs/client-config.ovpn"
  }
  lifecycle {
    create_before_destroy = true
  }
}
Now that is added, save your file and run the following command in your terminal.
terragrunt apply
Now lets setup our profile with AWS Client VPN. Open the AWS Client VPN application than
Click File > Manage Profiles

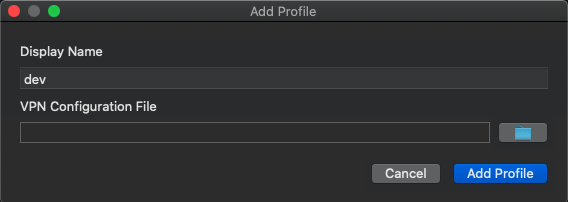
Click add Profile
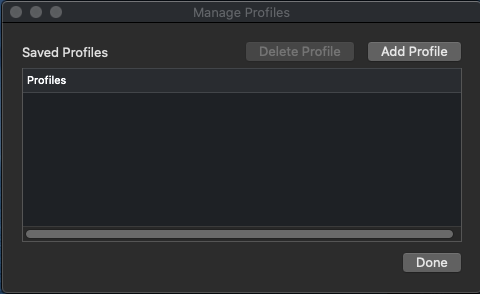
Link the profile to the terraform/certs/client-config.ovp file
Now connect to your VPN. Once connected ssh into your ec2 instance.
ssh ec2-user@10.200.217.138
The authenticity of host '10.200.217.138 (10.200.217.138)' can't be established.
ECDSA key fingerprint is SHA256:CHluwEG/6+0OdOkaIVCIyMv3qqYPf6EtNXjO1Vm+69E.
Are you sure you want to continue connecting (yes/no/[fingerprint])? yes
Warning: Permanently added '10.200.217.138' (ECDSA) to the list of known hosts.

       __|  __|_  )
       _|  (     /   Amazon Linux 2 AMI
      ___|\___|___|

https://aws.amazon.com/amazon-linux-2/
Great you are now connected.
Clean up
Now it is time to destroy our resources to avoid unwanted charges.
- Disconnect from the Client VPN
- Run the destroy ansible playbook in the terraform directory
- Delete the Certificates in the AWS Console located at https://console.aws.amazon.com/acm/home?region=us-east-1#/
- Delete the S3 bucket and its contents created by Terragrunt
- Delete the DynamoDB Table created by Terragrunt